Sunday, September 19, 2010

Graphic Onesies : Tutorial


Have you ever thought to yourself, "I could make that!" and then you try, and it's really not as good as you expected it to be?

I did that around this time last year with a necktie onesie for my sister in law. I free-handed a little pattern in the shape of a necktie and just sewed it right on there. It was cute, but not nearly as cute/perfect/professional as the one I recently found on Crap I've Made (which I really found via Big Sis Lil Sis -- thank you Erica!)

So when I needed a quick baby shower gift for one of the girls in my small group, Esther, I gave the ole necktie onesie another shot. And also tried the cute rocket graphic from Crap I've Made.


Here is a quick run down of how it's done:

Get a scrap of fabric you like, you don't need much. I used this black & gray paisley.


Iron a piece of Wonder Under to the scrap.


Peel the paper off and trace the pattern onto the fabric.


Cut your pieces out.

Place the knot onto your onesie, making sure its centered.


Slip the tail of the tie under the knot and iron in place.


Wonder Under is supposed to keep the fabric in place, even through washings, but I like the look of a little topstitch all the way around.


For the matching burp cloth, measure your trifold cloth diaper (mine was about 14 inches wide). Cut a strip of fabric 15x5. Tuck under 1/2 inch on each side and pin in place. Topstitch around all 4 sides. Repeat for the other end.

I recommend using white bobbin thread so the stitches are less noticeable on the underside.

There you have it! A matching onesie / burp cloth set.


Package up with a little gift card and you have the perfect shower gift!

Strawberry Jam


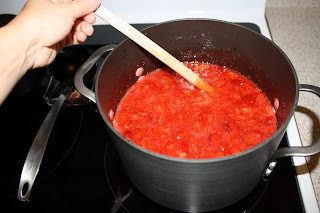
Some of you guys know that my husband and I live somewhat in the hood. We joke and call it the hood, but really, it is a very family oriented (and very food oriented) neighborhood. We have a regular ice cream truck that comes by just before the sun sets, we have the Mexican bread man who wheels his card by in the afternoons selling delicious baked goods. And every few days in the summer we have people come to the door selling flats of strawberries. I was home early from work last week when the strawberry guy came by. $7 for a flat of strawberries?? YES. Could my husband and I have eaten all 8 baskets of strawberries before they went bad? Probably not.


Next best thing? Jam.

This recipe is from the Ball Blue Book Guide to Preserving I got at the local hardware store for about $8. It has recipes for anything you could ever possibly can or preserve.

Strawberry Jam:

2 quarts strawberries
1 package powdered pectin
1/4 cup lemon juice
7 cups sugar


Wash strawberries; drain. Remove stems. Crush strawberries one layer at a time.


Combine strawberries, powdered pectin and lemon juice in a large saucepot.


Bring to a boil, stirring occasionally. Add sugar, stirring until dissolved. Return to a rolling boil. Boil hard 1 minute, stirring constantly.


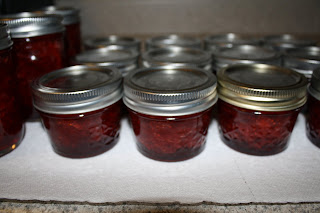
Remove from heat. Skim foam if necessary. Ladle hot jam into jars leaving 1/4 inch head space.


Adjust 2 piece caps (lid and ring) finger tighten the ring and let them sit on the counter undisturbed for 24 hours. You should hear the lids start to pop within a few minutes. This means they are sealing. Any jam recipe will call for you to process the jars for 10 minutes in boiling water. This is to ensure that they seal, but I have always found that they seal just fine without the boiling water bath. You can do it if you choose.


Make some cute labels and give them out to your friends and family.

There is something super satisfying about a PB&J with jam you made from scratch :)

Just a few notes here for anyone wanting to make their own jam:

~Most people sterilize their jars the traditional way by boiling them. You need to have clean jars for obvious reasons, and you need to have hot jars to prevent the glass from being shocked by the hot liquid and breaking. I like to run mine through the dishwasher and run the heated dry. This cleans them and gets them nice and hot. You can do it either way.

~When crushing the strawberries, you think you need to mush them up a lot, try to refrain; the chunks will break up once you boil the mixture.

~The insert says that you can add a little bit of butter to reduce foaming. I would suggest doing the butter. I didn't this time and I had a lot of foam. You don't want foam in your jam.

~ Last thing to remember about making jam- preparation is EVERYTHING. Make sure you read the recipe through a few times, have everything you need ready to go before you start. It is also way convenient to have an extra set of hands to do the lids while you ladle.

Have fun and enjoy the fruits of your labor!

Friday, September 17, 2010

My new go-to cookie!!

Peanut Butter Cup Cookies!!


When I need a quick batch of cookies for a party or just to satisfy a sudden sweet tooth, I usually fall back on the tried and true chocolate chip cookie. But when I had a Costco sized container of peanut butter on hand leftover from a camping trip, I started thinking of ways to chocolateize (yes, I just made that word up) the usual peanut butter cookie.

These are a total hit everywhere I bring them. As you can see from my pictures, I also used Hershey's Kisses because I wasn't sure if people would be put off by too much peanut butter on peanut butter action. Can you ever have too much peanut butter? Apparently not, because there are always leftovers of the Kiss ones, and none of the peanut butter cup ones.

Here's the recipe, it's from www.Cooks.com:

**One item of special equipment that will be needed: small tart tins / mini muffin tins.

1/2 c. butter
1/2 c. peanut butter
1/2 c. packed brown sugar
1/2 c. granulated sugar
1 egg
1/2 tsp. vanilla
1 1/2 c. flour
3/4 tsp. baking powder
1/2 tsp. salt
1 bag Reese's small peanut butter cups


Chill the peanut butter cups for a few minutes in the freezer, then unwrap. It works best when the cups are cold, the wrappers don't take any chocolate with them. Set unwrapped cups aside.

Cream butter, peanut butter and sugars. Beat in egg and vanilla. Add flour & baking soda to creamed mixture. Mix until a nice dough forms. Shape into 1 inch balls and put in ungreased small tart tins. Do not spread dough in cups, but feel free to press them down a little bit. Bake at 375 degrees for 8-10 minutes. Look for the cracks in the cookie to know when they're done. Remove from oven and immediately press peanut butter cup into center. Let cool in tins for 15 minutes and remove. Be careful when storing, the chocolate will remain melty for a while.

Makes 48-50 cookies.


You will be eating these by the half dozen, guaranteed.


Tuesday, August 24, 2010

Next Project: Quilt!


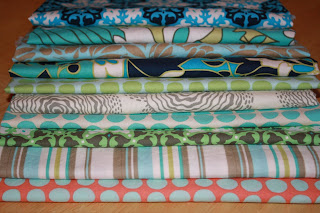
I am getting a little gutsy in my sewing and decided to try my hand at quilting. I found this quilt-a-long on I Have to Say and thought, "I could do that!". So here is a little preview of the fabrics I have chosen:

They are all Amy Butler, but from a few different lines. I think it is going to be really cute. More photos coming soon as my quilt progresses :)

Fresh Salsa à la Jeanine


My crafty mom is always finding cool new recipes. She has a very... shall we say... accepting palate. She can usually be found throwing this and that into any given recipe just to see if it works, or to use up what she has on hand. She throws beer into a lot of things. Random.

She gave me this recipe titled 'Quick Salsa'. I don't know where it came from, but the batch she made the other weekend was so good I immediately started a mental grocery list.

Here is the recipe she handed to me... can you tell she's a lefty?


These aren't necessarily the usual suspects....

** Update! Sept. 12th ... My mom clarified this weekend that when she said "Italian Style Tomatoes" she really meant the Roma tomatoes. NOT Italian seasoned tomatoes. Oops. It still tasted pretty good :)


juice of 3 limes
1/4 c. olive oil
1 jalapeno (seeded or not)
1 bunch of cilantro
1 small red onion chopped
1 can of whole peeled italian tomatoes (drained)
salt to taste

Pulse together in the food processor. That's it!

I added some garlic to mine because my husband and I both love our garlic :)

This is what my tomatoes looked like- I couldn't find whole Italian tomatoes, so I just used the diced ones. They're going to get pureed anyway, right?

Give everything else a rough chop. Even though it goes in the processor, you don't want any big chunks getting away from you.


This is what you get!


Its bright and tangy. Sticks nicely to a tortilla chip. This happened to be dinner for us tonight....

Tuesday, August 17, 2010

More Boxy Pouches

I am in love with these pouches!~


I made a bunch back in July for some of my girlfriends, but never got around to posting pics. My camera broke while I was in mid-photo-session, so I only have close-ups of a few. I am working on getting a new camera, possibly a DSLR, so if you have any input or advice, please leave a comment!


I love the classic look of black and white on the outside, with a burst of color in the inside:


This one was for my friend Sara who loves owls. I think it is one of my favorites:

You may recognize the Amy Butler fabric of this cutie:

And a reverse of the one above- burst of color on the outside, a nice neutral gray on the inside:


I didn't get a close up of the oil cloth one (top right in the group shot) but that one was made by request from my friend Serene who adores the bold colors and fruit themes of oil cloth. It was white with yellow polka dots on the interior. Very classic.

I will post some pics of these guys filled so you can get a feel for how big they are. I keep mine in my handbag and it holds quite a bit- a few chapsticks, lip gloss, matches, neosporin, 3 or 4 pens, hair ties, etc with plenty of room for more. I just think they are so handy to keep all of those small items in one place. no more fishing for a bobby pin or hair tie at the bottom of that hobo!

Tuesday, August 3, 2010

My Favorite Coleslaw


I love this spicy lime-peanut coleslaw on a hot summer day. It is mayo-free, so it is light and tangy with fresh flavors from the lime and cilantro and a great crunch from the cabbage and peanuts.

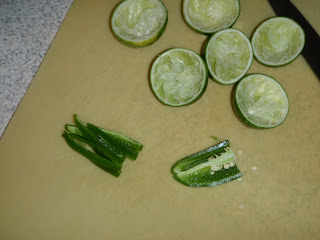
It is a breeze to fix up, most of your time will be spent juicing the limes and dicing the jalapeno.

Recipe is adapted from Epicurious.com:

1 cup peanuts, raw and unsalted
1/2 of a large head of cabbage, or 1 bag of Trader Joes shredded green cabbage
1 basket of cherry tomatoes, halved
1 jalapeno, seeded and diced (keep the seeds if you like it hot!)
3/4 cup cilantro, chopped
the juice of 3 limes (about 1/4 cup)
2 tablespoons olive oil
1/4 teaspoon sea salt


Roast the peanuts in a skillet for 5 to 10 minutes until golden and toasted. Shake the pan every minute or so and keep a close watch on them, they will burn if left too long!


While the peanuts are going, juice the limes and chop the jalapeno.


Whisk the olive oil into the lime juice and add the diced jalapeno. Add the salt. This is your dressing.


Halve the cherry tomatoes and chop the cilantro.


I like to leave a few of the cilantro leaves whole.


Quarter the head of cabbage and remove the core. Slice into thin shreds.... or just use the already shredded kind from Trader Joe's if you're short on time.... or just lazy :)


Combine the cabbage, tomatoes and cilantro in a bowl.


Drizzle the lime & olive oil mixture over the top and toss to coat. Add the cooled peanuts just before serving. They will lose some of the crunch if you add them too early. Taste and add more salt if desired.


Serve with your favorite BBQ chicken or have as a simple supper. It's the perfect summer dish!